

Assuming there are no pressing maintenance issues, prep work—easily 75 percent of the job of painting an existing house—can begin.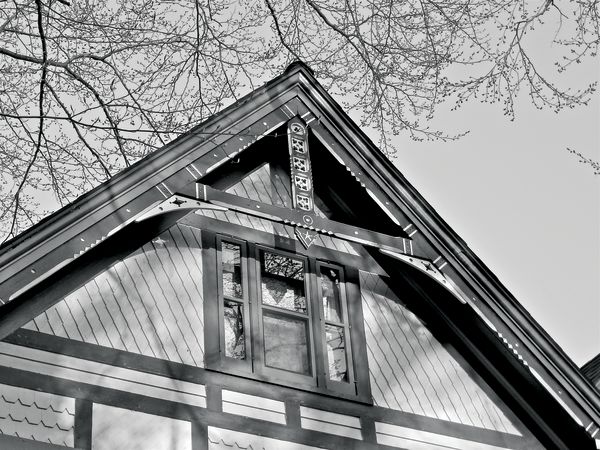
No matter how well built the house or how fine its lumber, the wood sheathing and trim needs a coat of paint to protect it from weather and other forces of nature, including ultraviolet light.
Before you pull out the paintbrushes and rollers, though, step back and consider whether the house has any maintenance issues that could compromise what is surely going to be an expensive, time-consuming job for you or your contractor. Missing gutters, a hidden roof leak, or a recurring moisture problem will compromise a new paint job if they are not addressed first.
Assuming there are no pressing maintenance issues, prep work—easily 75 percent of the job of painting an existing house—can begin. There are four key steps to take before the first coat of paint goes on the boards: cleaning; scraping and sanding; repair of missing or rotten wood; and priming. After all that, topcoat painting should be the easy part.
1. Cleaning
Paint sticks best to a clean surface. To remove the dirt, mold, and mildew that inevitably collect on the surface of a house, clean it using an environmentally safe agent (such as diluted vinegar) applied at low pressure, followed by a slightly higher power rinsing. (Or hire a pro to do it.) How much pressure should you use? As little as possible, since spraying water against the side of the house can force it into the walls. A standard garden hose will max out at 150 to 200 psi (pounds per square inch). Electric and gas pressure washers sold at building supply stores are rated at 1200 to 1600 psi, about 10 times more powerful. To err on the safe side, start with a low setting and test the power washer on an inconspicuous area. Keep the pressure under 1000 psi, and use a washer with an adjustable nozzle.
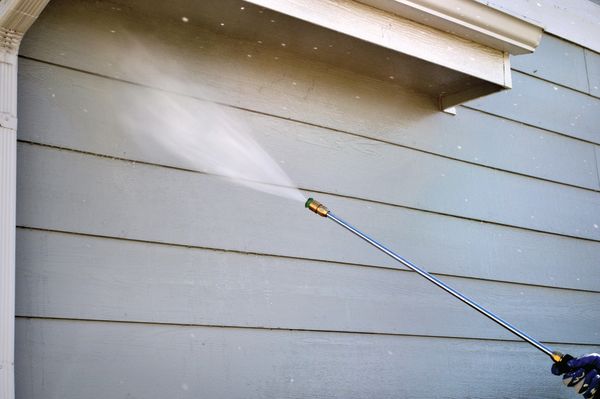
To begin, first dampen the house with water from a garden hose. Use a stepladder and spray down onto the siding, along the natural path rain takes. Work section by section with the pressure washer, applying the diluted cleaning agent through a low-pressure spray nozzle attached to the hose. Avoid spraying water upwards, especially under clapboards or shingles. Keep the nozzle at least a foot away from the surface; any closer and you could risk damaging the wood or forcing water into the house.
Rinse with plain water immediately, working from the top of the section down. Use just enough pressure to remove dirt and loose or peeling paint and any residue from the cleaning agent. Scrub stubborn areas with a stiff bristle brush. Once you’ve cleaned the entire house, allow the surface to dry for at least two days before priming or painting.
WATCH OUT! Most old houses were at some time painted with paint containing lead. Test with a kit checked in an EPA-approved laboratory. Results will tell you if the lead amount is over the legal limit. If it is, you’ll likely need to hire an approved abatement contractor.
2. Scraping & Sanding
Once the house is clean, the failing paint should be obvious: it will pop or peel away easily with a scraper. If there’s any chance of lead in the paint, wear a mask with a respirator, such as a P-100 or N-100, plus goggles and gloves. Protect shrubbery and the lawn with layers of plastic, which will also make it easier to clean up debris.
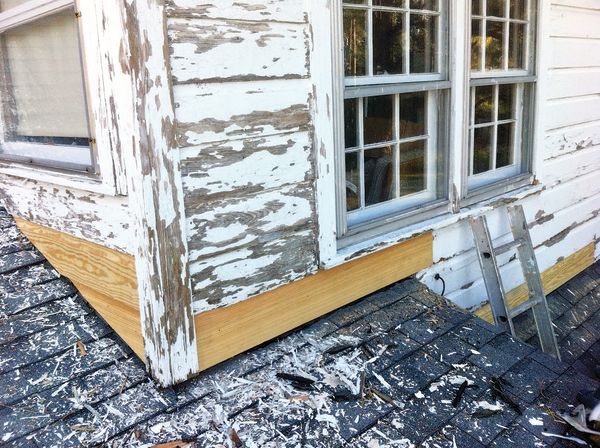
It usually isn’t necessary to scrape all the paint off the house, but remove all flaking, loose, blistered, or alligatored paint. Pry out loose or dried-out caulk and replace it with high-quality exterior caulk. The best tools for this messy job are putty knives and hand scrapers; have several on hand since some work better than others in different situations.
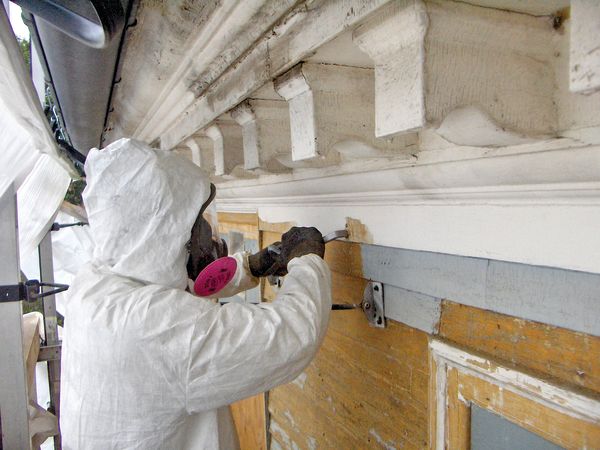
Once all of the popping paint has been removed, sand the scraped areas to feather the edges of the paint flush with the wood. Once again, you should wear a respirator. An orbital hand sander is handy for this, but avoid using disc sanders, which leave swirl patterns. Always work with the grain of the wood. To remove excess paint buildup from complex features like corbels or a cut-work bargeboard, apply an environmentally friendly paint stripper, then scrape off the residue and paint with a putty knife.
Really tough areas may require the application of heat. Rather than a heat gun, which can release lead and other toxins in the paint, use an EPA-compliant infrared paint remover, such as the Speedheater from Eco-Strip. Infrared heat opens up wood pores and warms the paint only to the point where it can be easily scraped off.
3. Wood Repair/Replacement
This is often the biggest part of any paint job, since it’s essential to repair or replace damaged clapboards or shingles and missing trim before painting. New wood or shingles should be of the same quality, thickness, and exposure (i.e., overlap) as the old, and installed using the same methods. This may require patching with a different wood species that’s comparable to the quality of old (tight-grain red cedar for old-growth spruce, for example) or cutting lumber to match out of larger stock. Last, use the same nailing method: exposed 3-penny nails through single or double courses, for instance, or blind nailed under the overlap.
Dealing with rot in a trim element like a window frame usually calls for repair with a two-part epoxy specifically made for wood, like those from Abatron. Once the repair has fully cured (a process that takes several hours), the repaired element is ready for paint.
4. Primer
A primer isn’t simply a diluted version of the topcoat. Its purpose is to bond with the surface and any existing paint, setting the stage for the smooth, well adhered finish coats. Traditional oil-based primers work best over exteriors with previous coats of oil paint, or where there are problem surfaces, both common situations with older homes. A good quality acrylic latex exterior primer will bond to the wood nearly as well. That said, many professional painters with expertise in historic restoration swear by oil-based and alkyd paints, just as they prefer to paint surfaces by hand with brushes. It may seem obvious, but if you plan to use oil or alkyd paint as a topcoat, do not use a latex primer. You can, however, apply latex over oil.
5. Painting
Once the house is cleaned, scraped, sanded, repaired, and primed, it’s finally ready for finish paint. Buy the best paint you can afford and choose all paints (primer, trim, and wall) from the same manufacturer. Whether you choose oil, alkyd, or acrylic latex, expect to apply two coats of paint, unless the coverage from the first coat is clearly sufficient. Allow ample drying time between applications.
The three main tools for applying paint are brushes, rollers, and spray applicators. Brushes are still the most versatile painting tool, especially for do-it-yourself jobs. Use brushes for clapboards, trim, windows, and doors, and to cut in around corners or adjacent surfaces.
Rollers work best for broad, flat areas, especially stucco or masonry, but can work well on wood, too. Mini rollers in 4½” and 6½” sizes may save a lot of labor on clapboards. Use a long-nap roller to get full coverage and to reach into crevices. “The rougher your surface, the deeper the nap needs to be,” says Sharon Dentz, advertising manager for Wooster Brush.
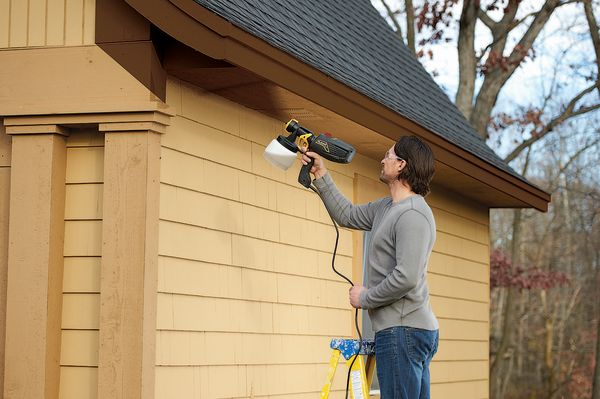
Spray painting works best on areas where brushing might cause dripping or pooling, such as elaborate trim, turned porch posts or balusters, and shutters. Spraying can also be a good choice for a large area—vertical board-and-batten siding, for example.
Yes, spray painting can save hours or even days of labor on exterior walls, but keep in mind that achieving an even, full-coverage coat with a spraying system requires both skill and practice. Additionally, sprayed paint will not look like brush-applied paint, which may be a matter of authenticity for old-house owners. Scott Austin Sidler, a restoration specialist and third-generation painter in Austin, Texas, says he gets good results by combining back-brushing with spray painting.
It’s a good job for two people. “We use the paint sprayer to simply get the paint onto the building since it is faster than constantly loading a brush or roller,” he writes in his guide for historic homeowners, Living in the Past (Austin Home Restorations, 2014). “While one person sprays, another person follows close behind, brushing the paint into the entire surface.”
Oil Versus Latex
Acrylic latex paints have come a long way since they first appeared in the 1940s—so far, in fact, that the term latex is used for any water-based paint. While oil-based paints are considered traditional for many old houses, they contain solvents, require solvents for clean up, and release volatile organic compounds (VOCs), gases that are harmful to human tissue and the atmosphere.
Just about every North American paint manufacturer makes low- or zero-VOC paints, and many are phasing out oil-based paints altogether. (Milk paint makers point out that their products—a combination of milk proteins, lime, and pigment—have always been non-toxic.)
What are the pros and cons of oil versus water-based paint from a performance standpoint? First, the pros: Oil has long been prized for its excellent adhesion, hard finish, and luster, especially on doors and trim. If a house is exceptionally old or has always been painted with oil, refreshing it with an oil-based formula will likely produce better results than a new coat of latex, even when the latter is formulated to bond well to an oil base.
Acrylic latex, on the other hand, can be just as long-lived, is easy to apply, cures quickly, and cleans up with soap and water. Acrylic latex is also more flexible, meaning it resists cracking due to swings in temperature and humidity. Latex paints offer superior color retention and are less likely to mildew than oil.
Want to hedge your bets? Consider an alkyd paint. Alkyds (a type of synthetic oil) can be part of the formulation of either oil or water-based paints. Water-based acrylic/alkyd formulas are especially good for trim work, approaching the hard, lustrous look once only possible with oil paints.
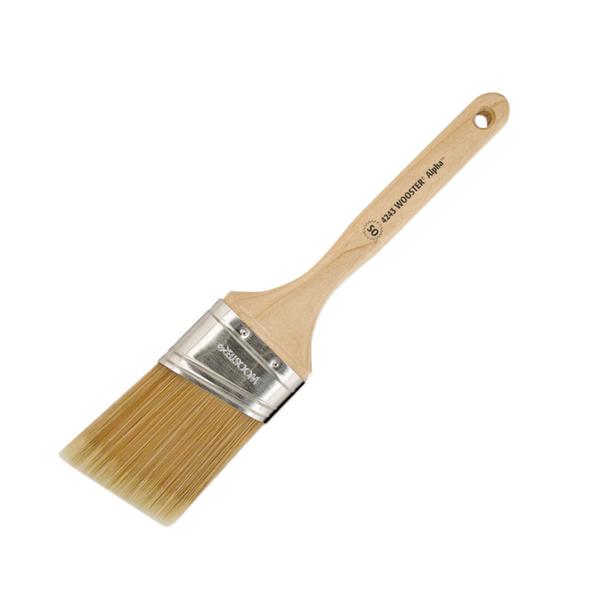
Brush Basics
A good brush is a painter’s friend. The best feel smooth and silky when rubbed against your hand and have superior balance. Good quality ones can be natural (hog’s hair, ox hair) or synthetic (nylon, polyester). Natural-bristle brushes are for use with oil paint, varnish, and shellac—they cannot be used with water-based paints, including latex. Synthetic brushes are best for water-based paints, and they can also be used with oil-based paints. Look for brushes that have:
- Long, flexible bristles of varying lengths. Long bristles allow the brush to hold more paint; flexible bristles make for a smoother finish.
- A slight taper from the heel of the brush to the end.
- Bristles with tapered ends.
- A handle shaped to fit the hand comfortably, preferably of wood.
- A sturdy, corrosion-resistant ferrule, such as stainless steel.
Brush Types
Choose brushes of the right size and shape for the job. Most are one of two types: chisel end or blunt end. Chisel end brushes cut into corners smoothly and hold a line along edges. Blunt end (or square edge) brushes hold more paint and are best for painting large, flat surfaces.
For exterior painting, your selections should include at least one each of the following:
- Wall brushes (blunt end, 3″ to 5″): Best for flat surfaces with minimal cutting in. If painting clapboards, match the width of the brush to the width of the clapboard.
- Flat sash and trim brushes (chisel end, 1″ to 4″): Ideal for window and door trim; choose width based on size of trim.
- Angle sash brushes (chisel end, 1″ to 3″): Angled brushes are designed for control, a big help on narrow surfaces including window muntins. The long side of the angle helps reach inside corners.


