

The new porch is not only picture-perfect, it’s built to last, thanks to thoughtful structural details.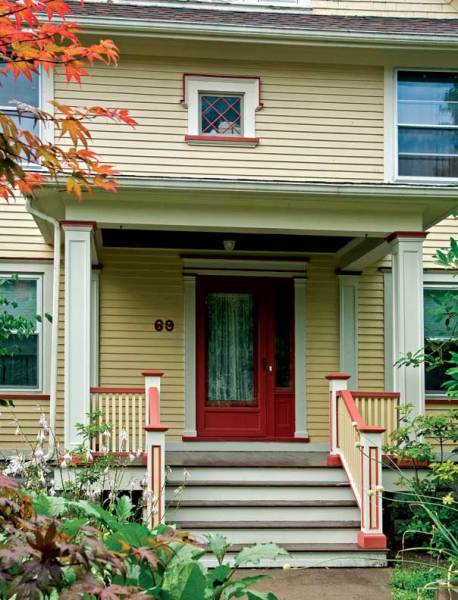
Drenched by the rain, covered in snow, and beaten by the sun, porches are vulnerable to every whim of the weather, and consequently require more maintenance than the rest of the house. Piecemeal repairs often make do for decades, but eventually porches must be replaced. When this happens, homeowners are often shocked to learn that the original building elements they’ve taken for granted for years are expensive and quite difficult to replicate.
Air-conditioning, television, and rear decks have rendered porches irrelevant on many streets, but that’s not the case in Rochester, New York’s Linden-South Historic District, where neighbors linger on their porches to visit with passersby, argue politics, compare the fruits of their gardens, and even show off their prize egg-laying chickens.
When district resident John Smith realized he needed a new porch on his circa-1905 Foursquare, he called Ted Robertson of Kirkwall Construction. Ted arrived to find a porch with rotten tongue-and-groove decking, disintegrating steps, falling-off balusters, columns compressed into the floor, and a distinct lean to the whole structure, including the roof. Ted’s experience told him that these visible clues foreshadowed structural problems below.
Getting Started
The old porch was crumbling away.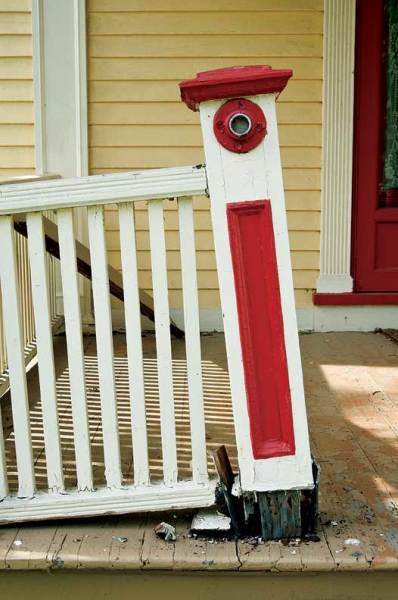
Ted and his associate, Mike Marini, began the job by spreading 6-mil plastic sheeting all around the porch—a requirement of the recent Lead Safe Work Practices legislation. (Because paint wasn’t being sanded or scraped, the men didn’t need to wear masks for this particular job.) Next, they supported the roof structure to clear the way for complete demolition of the porch. During the demolition, Ted and Mike set aside the columns, newels, and balusters, which they would replicate, and they cut and removed the flooring in small, uniform pieces that could easily be wrapped in plastic, sealed, and be carried away for disposal in a commercial dumpster per local regulations.
As expected, once the framing beneath the porch was exposed, the men discovered that it was completely shot. However, they found some good news, too: Faux-stone concrete piers were still plumb and in good condition, there was a concrete support at the termination of the stairs, and the porch roof and ceiling were sound, thanks to shingles that had been maintained through the years.
One of Ted’s tricks for making porches that last is ensuring that parts have good ventilation; here, he accomplishes this by installing vertical shims between the exterior joist and the finish apron (the shims are visible in the gap between these two elements).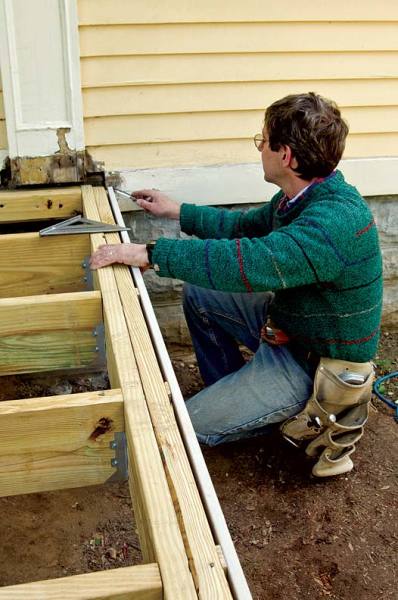
To build a new structural support, Ted and Mike attached a ledger to the wall with structural lag screws and pocketed the perpendicular rim joists into the stone foundation. With the exception of joist hangers at the rims, the 2×8 treated lumber was assembled identically to the old framing, and was gently sloped to shed water. As a final touch, Ted provided ventilation between the rim joists and finish apron by installing thin shims vertically on the exterior side of the joists. With the high cost of lumber and labor, such details ensure durability.
Deck Decisions
Ted and Mike wanted the porch deck to have a similar look and feel to the original, so they chose 5/4 (1″ thick) vertical-grain Douglas fir. Before they began assembly, they primed each board on all sides with a thinned coat of deck enamel—this primer can either be an oil-based floor paint or an oil-based enamel thinned 10 to 20 percent with mineral spirits, or a water-based enamel thinned to the same proportions with water. Because the porch was slightly less than 8′ long, Ted and Mike used full-length boards for durability and a better appearance.
When Ted assembles a porch deck, he begins and ends with a special technique that helps prevent the overlapping end boards from pulling loose where they overhang the edge: He glues the first and last three boards tightly together with marine epoxy. Then he cuts the tongue or groove on the termination side flush, and attaches the three-board panel to the framing with galvanized finish nails.
After gluing the first three boards together, Ted and Mike blind-nail the rest of the decking boards into place.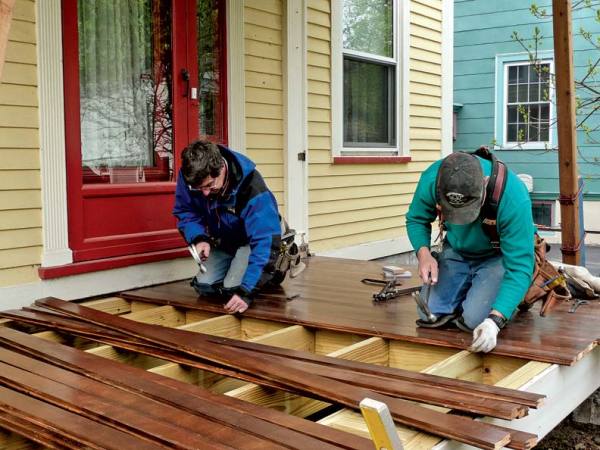
Ted never cuts decking boards to fit individually; he trims them to length after they are all installed. Like most carpenters, he determines a proper overhang depth above the apron, pops a chalk line, and makes a straight cut across the width of the porch; Ted and Mike then added a finishing touch by cleaning their cut up with a router.
Creating Components
To help the columns and posts last—by enabling air cir- culation and preventing trapped water—Ted rested them on thin lead shims before completing assembly.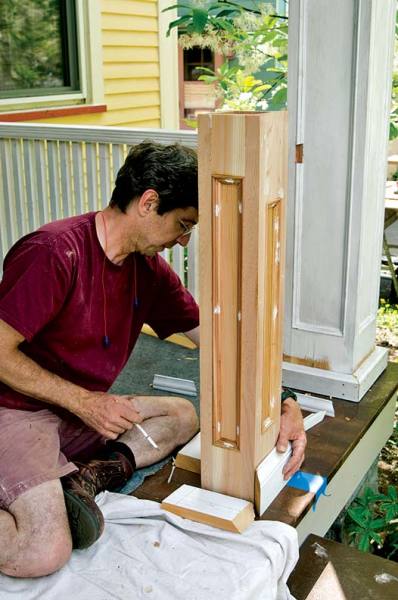
For the new column and baluster components, Ted chose Western red cedar. While cedar is expensive, it’s still available in clear, vertical-grain, old-growth stock, and is renowned for its resistance to rot and insect infestation. It also holds paint well. To further ensure longevity, Ted and Mike designed all joinery to shed water, taking extra care to slope the column bases. In addition to the columns, the men also replicated the balustrades, newels, and stair rails in the shop to match the originals. Each baluster end cut was primed before assembly, and then, to avoid face- or toe-nailing into the top rail, Ted and Mike attached the balusters’ upper ends to a separate piece of lumber with hot-dipped galvanized nails before attaching the entire unit to the top rail. (They attached the balusters’ lower ends from the underside of the bottom rail.)
When a porch develops a significant lean over the years, it is usually impossible to jack it completely back into position without removing the subsequent layers of accumulated roofing materials. This roof had remained pretty true—there was no perceptible lean in the roof ridge—so the men decided to leave it alone. As they reinstalled the columns, they rested them on thin lead shims to allow the undersides to ventilate and to prevent moisture entrapment between the column bases and the wood floor.
Stair Strategies
As with the other features, Ted and Mike constructed the stairs for strength and durability. Unlike most porch stairs, these are trimmed with finish lumber—also red cedar—that hides the frame beneath.
Ted and Mike began with a treated lumber frame, attaching thin shims to its sides to create an air space between the framing and the finish trim. All risers, treads, and side pieces were primed and fastened in a manner similar to the porch floor and fascia details.
The assembled stairs sport a final finishing touch—cove molding beneath each tread.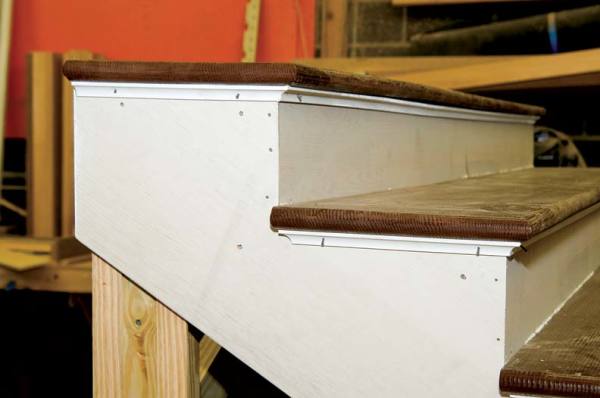
“We used full 11¼” fir treads and risers, sloping the treads ¼” toward the front,” Ted says. “We don’t drill holes, cut slots, or add any other drainage.” When stairs are constructed properly, as they once were, supplemental drainage via slots and holes isn’t necessary. The bottom riser and the side trim are held up above the ground on a 2″ piece of 5/4 pressure-treated decking. “It’s close to the ground, it gets wet, and has dirt and leaves collect against it,” explains Ted. “Even if the pressure-treated lumber doesn’t hold paint well, it’s usually too dirty to tell.”
Most porch stairs don’t get this degree of finish, but these are no ordinary stairs—they’re built to last. Ted terminated the porch steps with a little extra overhang to accommodate the finishing touch—a bed of cove molding beneath each stair. Icing on the cake, it’s the perfect decorative touch for a meticulously reconstructed porch in a great historic neighborhood.


