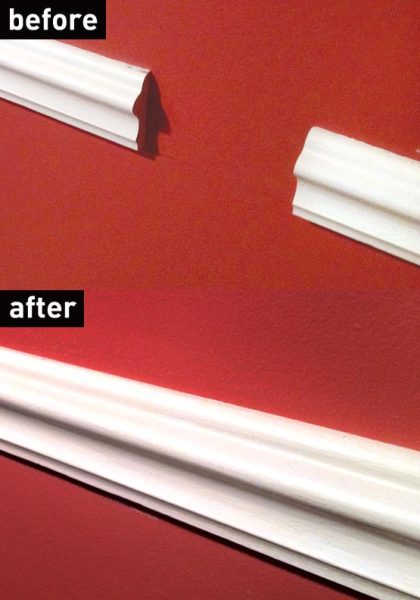
Historic moldings can go missing for a variety of reasons, and they’re not always easy to replace. Sure, you can order custom molding knives and pay for custom millwork, but this can be cost prohibitive—especially when only small pieces need replacing. Another approach is to appropriate a technique of the plaster trade. Plaster moldings were not always made in molds; some were “cut” with knives shaped with a profile. Traditionally, plaster could be “run in place” on the wall, using a profile knife to give the plaster a desired shape. The technique, used with plaster, wood filler, or epoxy, works well for re-creating small pieces of missing moldings.
Tools & Supplies
- Chemically resistant gloves (some may be supplied in the epoxy kit)
- Safety glasses
- Ear protection (especially if using a grinder)
- Plastic or metal drywall knives
- Tempered hardboard (Masonite)
- Expanded metal lath
- Masking tape
- Washer-head wood screws (GRK cabinet screws work well)
- Epoxy wood repair kit (Elmers or Abatron, etc.)
- Wood filler, water putty, or setting type drywall compound (optional)
- Acetone
- Primer and paint
- Dropcloth
- Rags
- Drill and bits
- Screwdriver
- Scroll saw or jigsaw (bench grinder optional)
- Files and/or sandpaper
- Tadpole sanding grips (available at Rockler)
- Work light
- Paintbrush
Step 1
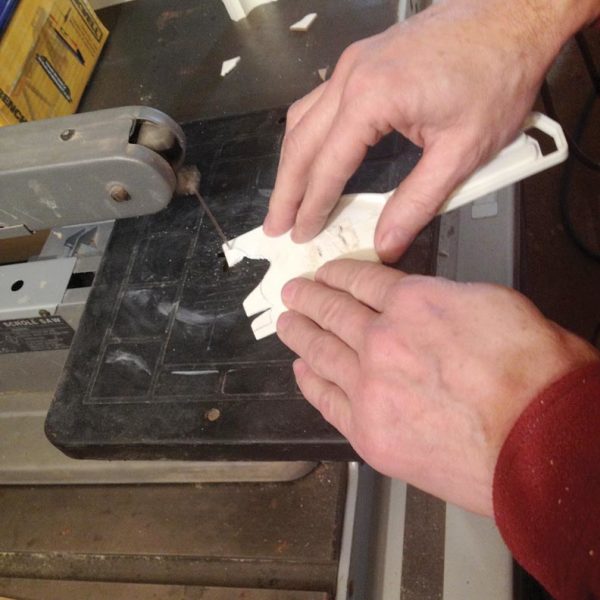
Copy the molding shape by tracing or using a profile gauge, then transfer the shape to a “knife blank” (metal or plastic drywall knives work well) with a permanent marker. Metal knives can be “cut” on a benchtop grinder (wear protective gear), while plastic or wood/Masonite knives can be cut on a scroll saw or jigsaw. For patching voids deeper than ½”, make one knife for the scratch coat (trimming 1/8″ to ¼” off of the leading edge to set this coat back slightly), and one for the topcoat (filing and sanding the edge so it’s a close match to the molding).
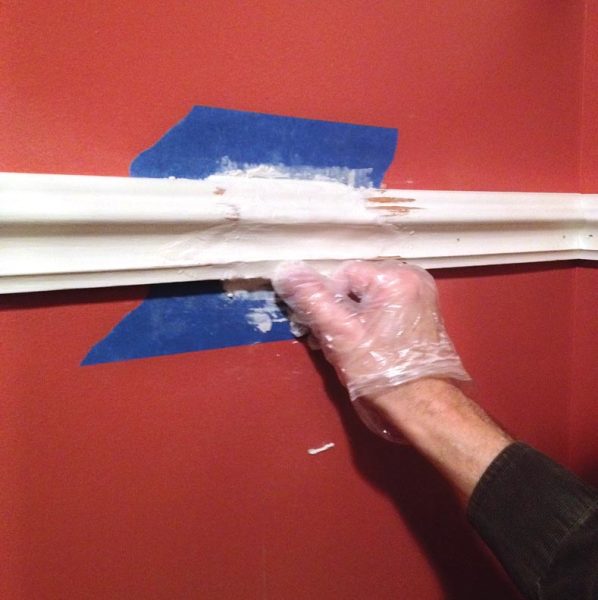
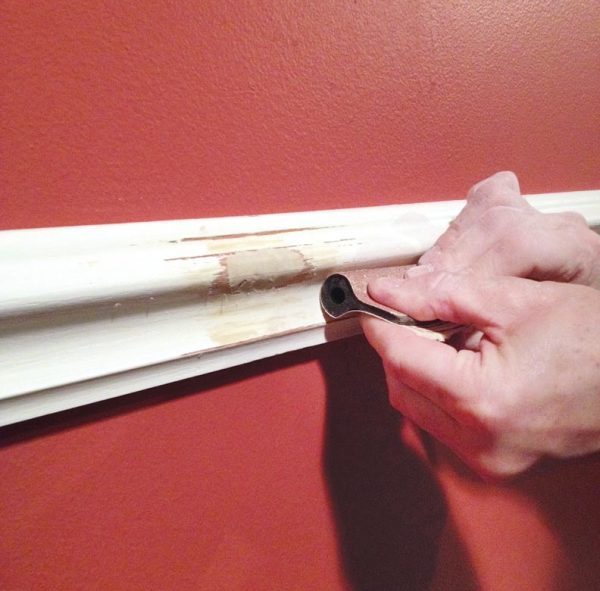
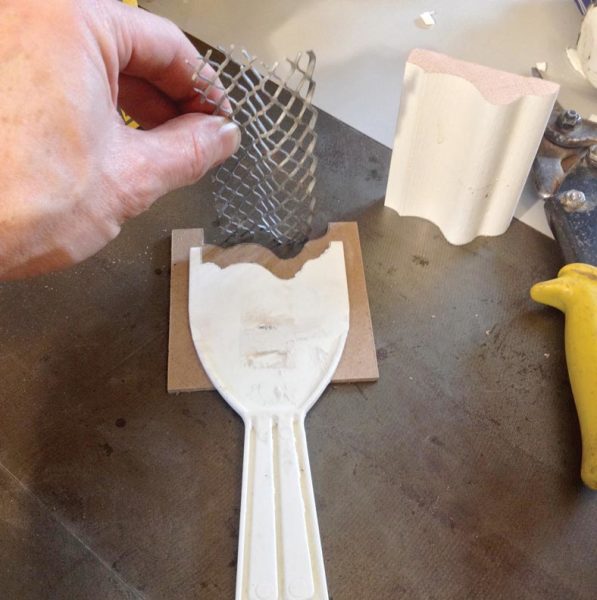
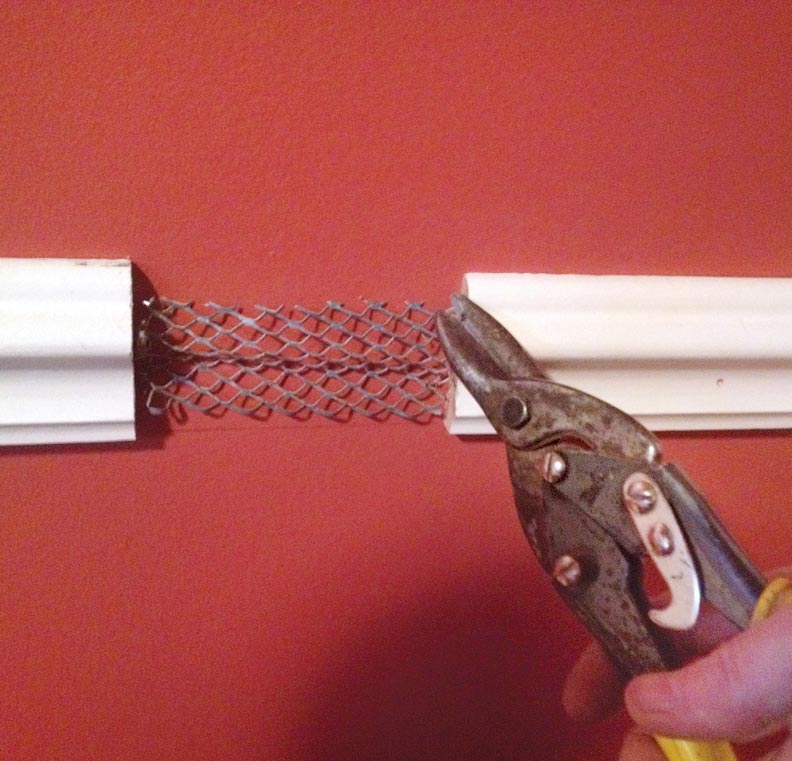
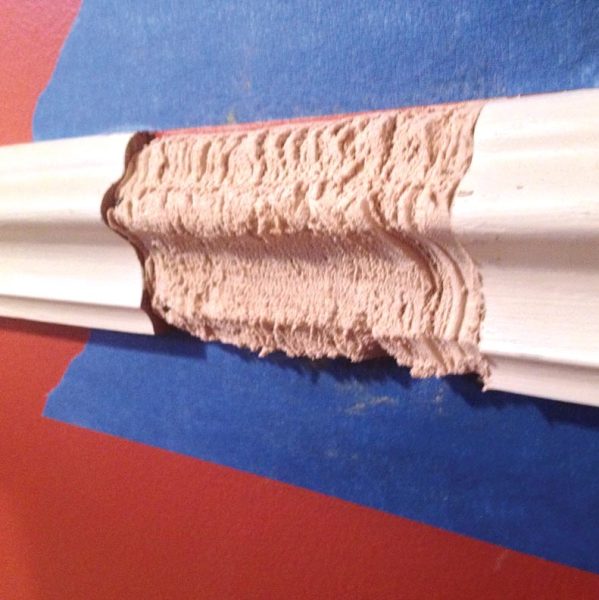
Trace the profile of the molding. Cut the profile knife on a scroll saw. Cutting the scratch coat knife out of plastic with a scroll saw naturally produces a rough edge. The trickiest part is cutting slow enough—too fast, and the blade heats up and the plastic welds itself back together. Don’t be concerned if some melting occurs; the profile can be snapped out even with minor connections. Prepare large areas where moldings are missing with expanded metal lath, shaping it to approximate the curves of the molding and screwing it to the wood on either side of the void. If the missing area is small, you can just drive a washer-head screw into it; its head will help anchor repair material. If a repair is due to decay from exposure to moisture, remove unsound wood and treat the remaining wood with a hardener. Shape the metal lath using the profile knife. Install the metal lath on the wall. Apply the scratch coat. I used a structural epoxy here (Elmer’s), and ran the profile knife with a chopping motion to add extra striations and ensure that the epoxy was pushed firmly into the lath. Work quickly, as epoxy used in large quantities will cure faster due to heat buildup. The surface roughness of this coat will ensure a good bond, and also allows for a much thinner topcoat—a thin layer dissipates heat better and slows down the reaction that causes the material to set. You’ll appreciate the longer work time and smooth topcoat that results. Apply the scratch coat. Place the topcoat (I like to use Abatron, which tools nicely), running it with your remaining profile knife; it should sit slightly proud of the adjacent molding. Then, tool the epoxy with gloved fingers. Use a cloth dampened with acetone to wipe the surface of the epoxy and the gloves. After it cures, file and/or sand the epoxy until you can move your profile knife seamlessly along the repair. Backlighting the knife can help you find high and low spots that need smoothing. The patch is now ready to be primed and painted. Tool the epoxy with gloved fingers. Sand the epoxy after it cures.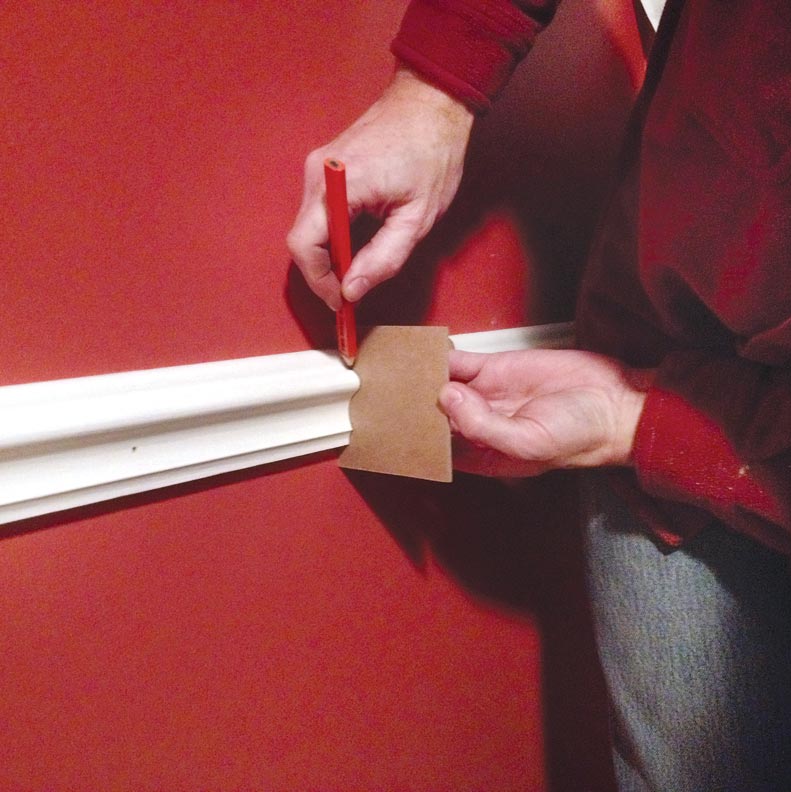
The Pro Tip
Step 2
Step 3
Step 4