

Preservationist John Leeke re-glazes an old sash.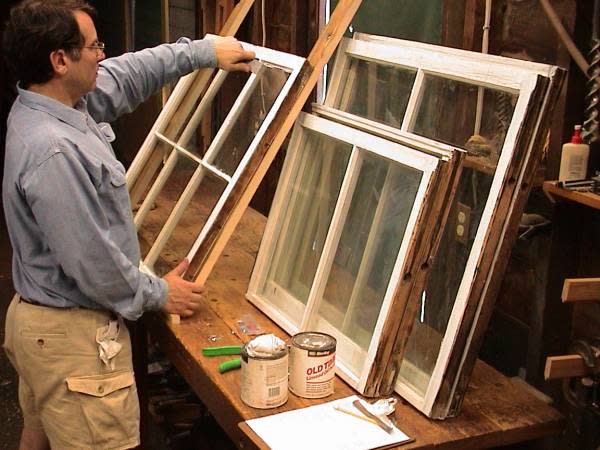
As a preservationist for nearly five decades (and an OHJ contributor for 26 years!), John Leeke has encountered more than his share of old windows. In between repairing the windows on his own 1899 Victorian in Maine (“My wife is going to shoot me if I don’t get that window in the back bedroom fixed before the first warm breezes of summer,” he says), he shared with us some of the lessons he’s learned over the years.
OHJ: How can you tell when window sash is too damaged to be rehabbed?
John Leeke: I’ve repaired hundreds of sashes and assessed the condition of more than a thousand, and never seen a sash that could not be repaired. It usually boils down to an economic decision. Will it cost less to repair and rehabilitate a sash, or to replace it with one of equal quality? The hidden trick is that most replacement sash on the market won’t be as good quality as the old sash, and replacements that do match the quality are very costly. The cost of repair/rehab varies greatly with the experience and labor cost of the worker. A professional window specialist keeps track of time and materials costs and will accurately estimate the rehab costs. A do-it-yourselfer does not have to pay for labor. If you are just starting out with repairing your own windows, repair or refurbish at least ten sash to learn how and get up to speed before you decide a sash is too damaged to rehab. Often I can repair one completely rotted out sash joint, replace a fourth of the putty, and paint a sash for less than the cost of a replacement sash.
OHJ: What kind of safety precautions should you take on a window-rehab project?
JL: First, determine the safety risks. Lead-containing paint and putty release lead particles that can get into the human body and cause serious health problems. Chemical fumes from paint and epoxy also can lead to health problems. Dry-heat paint and putty removal methods can start building fires. Working in high places presents the danger of falling.
Protect occupants and visitors by hanging simple signs with big letters and red “keep out” safety tape to discourage people and pets from entering work areas. Wear safety glasses or goggles to protect eyes from flying debris, and wear a hardhats and a respirator to keep dust out of your body. Have a spray bottle filled with water and roll of paper towels on hand for damp-spot-cleanup of lead-containing dust during work. Set up a wash-station at the exit of the work area so you can wash your hands and face before leaving work area.
Use blue painter’s tape to seal the edges of doors and windows to prevent lead-containing dust from spreading outside the work area. Also protect the building by covering floors with 6-mil poly sheeting taped to the baseboards. After the project is finished, fold up and dispose of the poly sheeting, and remove any remaining debris with a HEPA vacuum, followed by a damp rag and mild detergent.
Savo Hall, a historic structure on the prairies of South Dakota, is a perfect candidate for a window restoration workshop.
OHJ: What are some of your favorite tools to use when restoring windows?
JL: To release painted-shut sashes, I use a portable steamer and pull-type scraper. A specialized tool called the Window Zipper also is great for loosening painted joints. I use a combo of two 3″ stiff putty knifes and a thin pry bar to wedge out stops, beads and sash. I rely on a very stiff 1.5″ putty knife to tool putty, and a soft, thick paintbrush to dust off the glass with dry powder whiting. I prefer a 4″ beveled sash brush for painting after the window is repaired, and a HEPA hip-pack vacuum for spot scraping and cleanup.
OHJ: What type of glazing putty do you recommend?
JL: There are three types of glazing compound, and each has its place in good window work. Traditional linseed oil-type putties (like Sarco MultiGlaze Type M or Allback Linseed Oil Putty) are hard, “knife grade” putties. Modified oil-type glazing compounds (such as Glazol, Perm-E-Lastic, and DAP 33, although many window specialists are not fond of the latter) are either semi- or non-hardening. And acrylic glazing compounds can be either hardening (Aqua-Glaze) or elastomeric and flexible (Glaze-Ease 601). The most important thing is to look for a putty that serves your needs and gives long-term performance, but can be easily removed and renewed when it deteriorates. My current standard is the traditional linseed oil type, specifically Sarco Type M, but I sometimes use others for their special characteristics.
OHJ: When you must splice new wood in to replace a rotted piece, what’s your preferred joinery method?
JL: I use a half-lap joint and glue it in place with either an epoxy adhesive formulated for wood, or a foaming polyurethane type.
OHJ: What can you do to prevent future decay on wooden window sash?
JL: Keeping water out is the most important consideration. In addition to performing spot paint and putty maintenance to prevent water from getting in, you should also keep the gutters above the window cleaned out and working. Treat the bare wood surface with a paintable water-repellent preservative after you’ve finished all woodwork repairs and before priming and painting, and also inject a borate-type preservative to treat the inner volume of the wood.
When painting sash, it’s important to “paint to the line” to help protect the wood from moisture infiltration.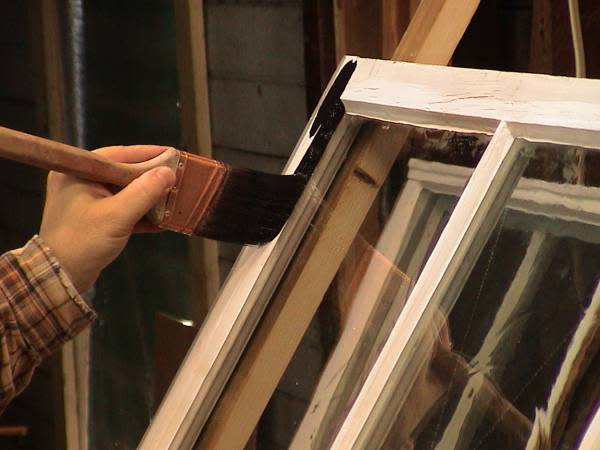
OHJ: What’s one window restoration lesson you’ve had to learn the hard way?
When painting sash, you should always lap the paint past the edge of the putty over onto the glass about 1/16″ to seal the joint between the glass and the putty to keep water out. I once had to go back are repaint a whole house full of sashes because we missed this critical detail.
OHJ: What’s the strangest problem you’ve ever encountered?
To me, the strangest problem is how many old-house owners have been persuaded to throw away all their fine old windows and replace them with plastic counterparts that will last only 5 to 20 years. A well-built old window can be maintained and repaired to last for centuries and can also be upgraded to meet current energy-saving goals with simple, low-cost treatments like exterior storms, interior air panels, or even ordinary roller shades.
However, I have renewed hope for both homeowners and windows. Homeowners are waking up and realizing they can maintain and repair their fine old windows. Even if you’re not a do-it-yourselfer, don’t worry—more and more savvy tradespeople are recognizing this new market for traditional window maintenance and repair services.
Want more tips on fixing your old windows? Learn more about sash window repair.
For more information, including detailed step-by-step instructions for many of the repairs mentioned here, check out John Leeke’s newly updated book, Save America’s Windows, available at historichomeworks.com.


